记录一次从零开始的React组件库项目
June 25, 2023
项目地址:https://github.com/Russellwzr/russell-react-ui
整体流程
- 项目结构和代码规范
- 样式解决方案
- 组件需求分析及实现
- 测试用例分析及实现
- 组件库自动文档生成
- npm 打包发布及文档网站部署
一、项目结构和代码规范
文件结构设置
russell-react-ui/
  .github/
  .husky/
  .storybook/
  .prettierrc
  node_modules/
  README.md
  package.json
  package-lock.json
  tsconfig.json
  tsconfig.build.json
  src/
    hooks/
      ......
    components/
      Button/
        button.tsx
        button.test.tsx
        button.stories.tsx
        style.scss
      ......
    styles/
      _variables.scss (各种变量以及可配置设置)
      _mixins.scss (全局 mixins)
      _reboot.scss (normalize.css)
      _functions.scss (全局 functions)
    index.tsx
代码规范配置
ESLint
  "eslintConfig": {
    "extends": [
      "react-app",
      "react-app/jest"
    ],
    "plugins": [
      "react-hooks"
    ],
    "rules": {
      "react-hooks/rules-of-hooks": "error",
      "react-hooks/exhaustive-deps": "warn"
    }
  }
Prettier
  {
    "singleQuote": true,
    "trailingComma": "all",
    "printWidth": 120,
    "bracketSpacing": true,
    "semi": false,
    "tabWidth": 2,
    "jsxSingleQuote": false,
    "overrides": [
      {
        "files": ".prettierrc",
        "options": { "parser": "json" }
      }
    ],
    "endOfLine": "auto"
  }
Husky
  npm install husky --save-dev

  // 开启 git hooks
  npx husky install
  npm pkg set scripts.prepare="husky install"

  // 设置每次git commit前自动运行组件测试以及eslint代码检查
  npx husky add .husky/pre-commit "npm run test:nowatch && npm run lint"
  git add .husky/pre-commit
二、样式解决方案
-
选取了 SCSS 作为样式解决方案
- 样式解决方案分析可见之前文章:React 项目样式解决方案杂谈
-
样式相关文件结构
styles/ _variables.scss (各种变量以及可配置设置) _mixins.scss (全局 mixins) _functions.scss (全局 functions) _reboot.scss (normalize.css) components/ Button/ style.scss (组件单独的样式) ... -
色彩系统
- 系统色板:基础色板 + 中性色板
- 产品色板:品牌色板 + 功能色板
-
字体系统(设置 font-family, font-size, font-weight …)
-
添加 normalize.css(修改为 _reboot.scss 并融合 _variables.scss 里的变量设置)
三、组件需求分析及实现
该部分选取了 Form 以及 Select 组件进行记录,只介绍主要的分析与设计流程,具体实现可参见仓库源码。
Form Component
1. 主体功能分析
-
默认设置:支持在表单顶层设置各个表单元素的默认值,以方便提示及重置
-
灵活渲染:既可以自行决定子元素节点的选取,还可以结合表单状态定制渲染结果
-
规则验证:支持自定义规则、多项规则校验、自定义验证时机、表单整体验证
-
实例获取:用户可以直接获取表单的状态及方法来更加方便地实现复杂的业务需求
2. 组件结构设计
采取 Form+FormItem 的层级结构,以灵活支持 UI 自定义(ant-design, arco-design 等组件库都使用了该方式)
<Form>
  <FormItem label="Username">
    <Input placeholder="please enter your username..." />
  </FormItem>
  <FormItem label="Post">
    <Input placeholder="please enter your post..." />
  </FormItem>
  <FormItem>
    <Checkbox>I have read the manual</Checkbox>
  </FormItem>
  <FormItem>
    <Button type="primary">Submit</Button>
  </FormItem>
</Form>
结合上述功能需求,两个组件的属性设计如下:
/**
 * Form Component
 */
/** Custom Rendering */
export type RenderProps = (form: FormState) => ReactNode
export interface FormProps {
  /** Prefix of the form field */
  name?: string
  /** Default values for initialization and reset */
  initialValues?: Record<string, any>
  /** Callback function after the form is submitted and the data validation is successful */
  onFinish?: (values: Record<string, any>) => void
  /** Callback function after the form is submitted and the data validation fails */
  onFinishFailed?: (values: Record<string, any>, errors: Record<string, ValidateError[]>) => void
  children?: ReactNode | RenderProps
}

/**
 * FormItem Component
 */
export interface FormItemProps {
  /** Field name */
  name: string
  /** Label content */
  label?: string
  /** Attribute of the value of the child node, e.g. 'type=checkbox' is 'checked' */
  valuePropName?: string
  /** Set how to trigger value changes, e.g. onChange */
  trigger?: string
  /** Set how to get field value from event, e.g. e.target.value */
  getValueFromEvent?: (event: any) => any
  /** Validation rules (see async-validator for more details) */
  rules?: CustomRule[]
  /** Set the timing of field validation */
  validateTrigger?: string
  children?: ReactNode
}
3. 组件状态管理
由上述分析可以看出,需求中的部分功能,如“表单整体验证”,需要 Form 组件结合 FormItem 组件的相关状态进行处理,而这两种组件之间存在着层级关系且 Form 采用 children 的方式渲染 FormItem,状态传递的实现较为复杂,因此这里采用 Context 来将两种组件的状态进行共享,并借助 useReducer 来实现状态更新。
共享状态属性设置:
-
表单整体状态 FormState,包含表单是否合法、是否提交以及规则验证返回的错误信息
export interface FormState { isValid: boolean isSubmitting: boolean errors: Record<string, ValidateError[]> } -
表单元素状态 FieldDetail,包含名称、值、自定义规则、是否合法以及规则验证返回的错误信息
export interface FieldDetail {
  name: string
  value: string
  rules: CustomRule[]
  isValid: boolean
  errors: ValidateError[]
}

export interface FieldsState {
  [key: string]: FieldDetail
}
状态更新相关 action:
-
addField 添加表单元素,updateValue 更新表单元素,updateValidateResult 更新校验结果
export interface FieldsAction {
  type: 'addField' | 'updateValue' | 'updateValidateResult'
  name: string
  value: any
}

function fieldsReducer(state: FieldsState, action: FieldsAction): FieldsState {
  switch (action.type) {
    case 'addField':
      return {
        ...state,
        [action.name]: { ...action.value },
      }
    case 'updateValue':
      return {
        ...state,
        [action.name]: { ...state[action.name], value: action.value },
      }
    case 'updateValidateResult':
      const { isValid, errors } = action.value
      return {
        ...state,
        [action.name]: { ...state[action.name], isValid, errors },
      }
    default:
      return state
  }
}
4. 组件功能实现
这里只贴了部分流程逻辑,具体实现可参见仓库源码
-
初始化 Store
// form.tsx const { name, initialValues, onFinish, onFinishFailed, children } = props const { form, fields, dispatch, ...restProps } = useStore(initialValues) const { validateField, validateAllFields } = restProps const passedContext: IFormContext = { dispatch, fields, validateField, initialValues, } -
结合表单状态定制表单元素渲染
let childrenNode: ReactNode if (typeof children === 'function') { childrenNode = children(form) } else { childrenNode = children } return ( <form name={name} className="form" onSubmit={submitForm}> <FormContext.Provider value={passedContext}>{childrenNode}</FormContext.Provider> </form> ) -
创建表单元素:获取初始值,触发 addField 操作,并借助 React.cloneElement 实现组件元素自定义设置的注入
// formItem.tsx /** Initialize the form content */ useEffect(() => { const value = (initialValues && initialValues[name]) || '' dispatch({ type: 'addField', name, value: { label, name, value, rules: rules || [], errors: [], isValid: true } }) }, []) /** Add the custom attributes to FormItem */ const onValueUpdate = (e: any) => { const value = getValueFromEvent(e) dispatch({ type: 'updateValue', name, value }) } const onValueValidate = async () => { await validateField(name) } const controlProps: Record<string, any> = {} controlProps[valuePropName] = value controlProps[trigger] = onValueUpdate if (rules) { controlProps[validateTrigger] = onValueValidate } const childList = React.Children.toArray(children) if (childList.length === 0) { throw new Error('No child element found in Form.Item, please provide one form component') } if (childList.length > 1) { console.warn('Only support one child element in Form.Item, others will be omitted') } if (!React.isValidElement(childList[0])) { throw new Error('Child component is not a valid React Element') } const child = childList[0] as React.ReactElement const customChildNode = React.cloneElement(child, { ...child.props, ...controlProps }) -
自定义规则及规则验证
const transfromRules = (rules: CustomRule[]) => { return rules.map((rule) => { if (typeof rule === 'function') { const calledRule = rule({ getFieldValue }) return calledRule } else { return rule } }) } const validateField = async (name: string) => { const { value, rules } = fields[name] const afterRules = transfromRules(rules) const descriptor = { [name]: afterRules, } const valueMap = { [name]: value, } const validator = new Schema(descriptor) let isValid = true let errors: ValidateError[] = [] try { await validator.validate(valueMap) } catch (e: any) { isValid = false errors = e.errors } finally { dispatch({ type: 'updateValidateResult', name, value: { isValid, errors } }) } } const validateAllFields = async () => { let isValid = true let errors: Record<string, ValidateError[]> = {} const valueMap = mapValues(fields, (item) => item.value) const descriptor = mapValues(fields, (item) => transfromRules(item.rules)) const validator = new Schema(descriptor) setForm({ ...form, isSubmitting: true }) try { await validator.validate(valueMap) } catch (e) { isValid = false const err = e as ValidateErrorType errors = err.fields each(fields, (value, name) => { if (errors[name]) { const itemErrors = errors[name] dispatch({ type: 'updateValidateResult', name, value: { isValid: false, errors: itemErrors } }) } else if (value.rules.length > 0 && !errors[name]) { dispatch({ type: 'updateValidateResult', name, value: { isValid: true, errors: [] } }) } }) } finally { setForm({ ...form, isSubmitting: false, isValid, errors }) return { isValid, errors, values: valueMap, } } } -
forwardRef + useImperativeHandle 暴露实例方法
export const Form = forwardRef<IFormRef, FormProps>((props, ref) => {
  const { form, fields, dispatch, ...restProps } = useStore(initialValues)
  ......
  ......
  ......
  // forwardRef + useImperativeHandle to expose instance methods
  useImperativeHandle(ref, () => {
    return {
      ...restProps,
    }
  })
  ......
  ......
  ......
})
Select Component
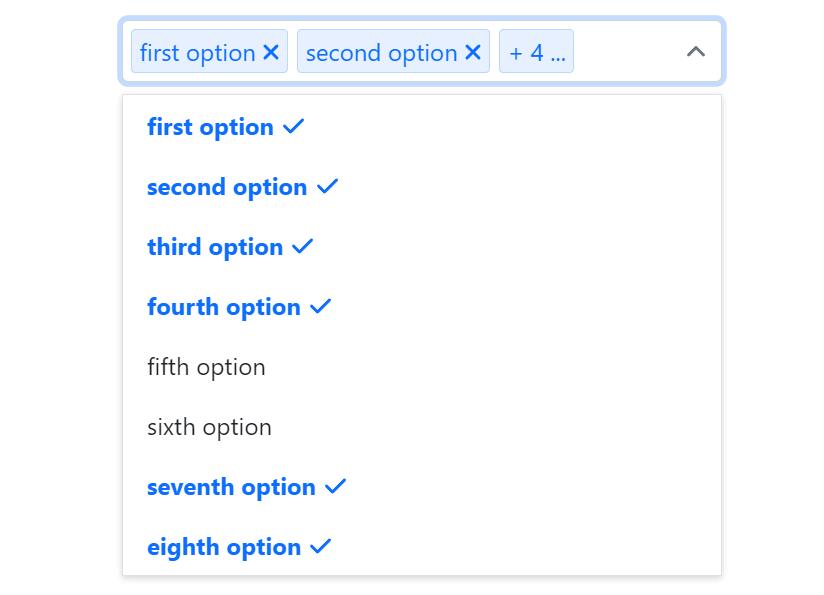
Select 组件的需求比较简单,即支持选项的自定义以及单选多选等,提及它只是为了强调在开发过程中一定要注意边缘 case,这里以多选框为例,当选项过长或者选择的选项过多时,就会出现下面这种情况:

选项过长导致 tag 框溢出,选择的选项过多导致 tag 框溢出了选择框,上述问题可以通过实时获取 tag 框的高度并对多选框的高度进行动态更新以及溢出样式调整来解决,效果如下:

此外,有些情况下,用户选择的选项会特别多,为了防止 tag 框的无限增高对页面整体布局的影响,这里额外设置了一个自定义选项,让用户来控制选择框中所显示的标签数,效果如下:
四、测试用例分析及实现
使用 Jest + React Testing Library 进行测试,通过 Jest 提供的测试运行环境和断言库以及 React Testing Library 在 react-dom 和 react-dom/test-utils 之上提供的轻量级函数,可以实现更加接近用户使用方式的测试流程。
这里以 Select 组件的一个测试用例为例,进行介绍,整个测试流程如下:
- 获取选择框对应的 dom 元素,然后触发点击事件显示所有选项
- 获取所有选项对应的 dom 元素,然后依次触发点击事件,选中选项
- 检查 tag-items 的数目以及额外选中的选项数是否符合预期
- …
由此可以看出,整个测试流程其实就是通过程序来模�拟测试人员的手动测试,以自动化的方式提高测试的效率与准确度。
it('Max Tag setting in multiple mode should works fine', () => {
  render(
    <Select {...multipleProps} maxTagCount={2}>
      <Option value="id1" label="first" />
      <Option value="id2" label="second" />
      <Option value="id3" label="third" />
      <Option value="id4" label="fourth" />
    </Select>,
  )
  const inputEle = screen.getByPlaceholderText('test') as HTMLInputElement
  fireEvent.click(inputEle)
  const firstItem = screen.getByText('first')
  const secondItem = screen.getByText('second')
  const thirdItem = screen.getByText('third')
  const fourthItem = screen.getByText('fourth')
  fireEvent.click(firstItem)
  fireEvent.click(secondItem)
  fireEvent.click(thirdItem)
  fireEvent.click(fourthItem)
  expect(screen.getAllByTestId('tag-items').length).toEqual(3)
  expect(screen.getByText('+ 2 ...')).toBeInTheDocument()
  fireEvent.click(fourthItem)
  expect(screen.getAllByTestId('tag-items').length).toEqual(3)
  expect(screen.getByText('+ 1 ...')).toBeInTheDocument()
  fireEvent.click(thirdItem)
  expect(screen.getAllByTestId('tag-items').length).toEqual(2)
})
Jest 使用注意:
- Jest 运行在 Node.js 环境上,遵循 CommonJS 规范,使用一些第三方库时,需要将导入导出模块从 ES Module 规范转为 CommonJS 规范,而 Jest 默认忽略/node_modules/目录的转换,因此需要我们手动把引用报错的模块在 transformIgnorePatterns 里排除掉,当然一些库比如 axios 额外提供了 CommonJS 规范的代码,我们也可以通过直接设置 moduleNameMapper 来解决。
- https://stackoverflow.com/questions/73958968/cannot-use-import-statement-outside-a-module-with-axios
  "jest": {
    "transformIgnorePatterns": [
      "<rootDir>/node_modules/(?!lodash-es)"
    ],
    "moduleNameMapper": {
      "axios": "axios/dist/node/axios.cjs"
    }
  },
五、组件库自动文档生成
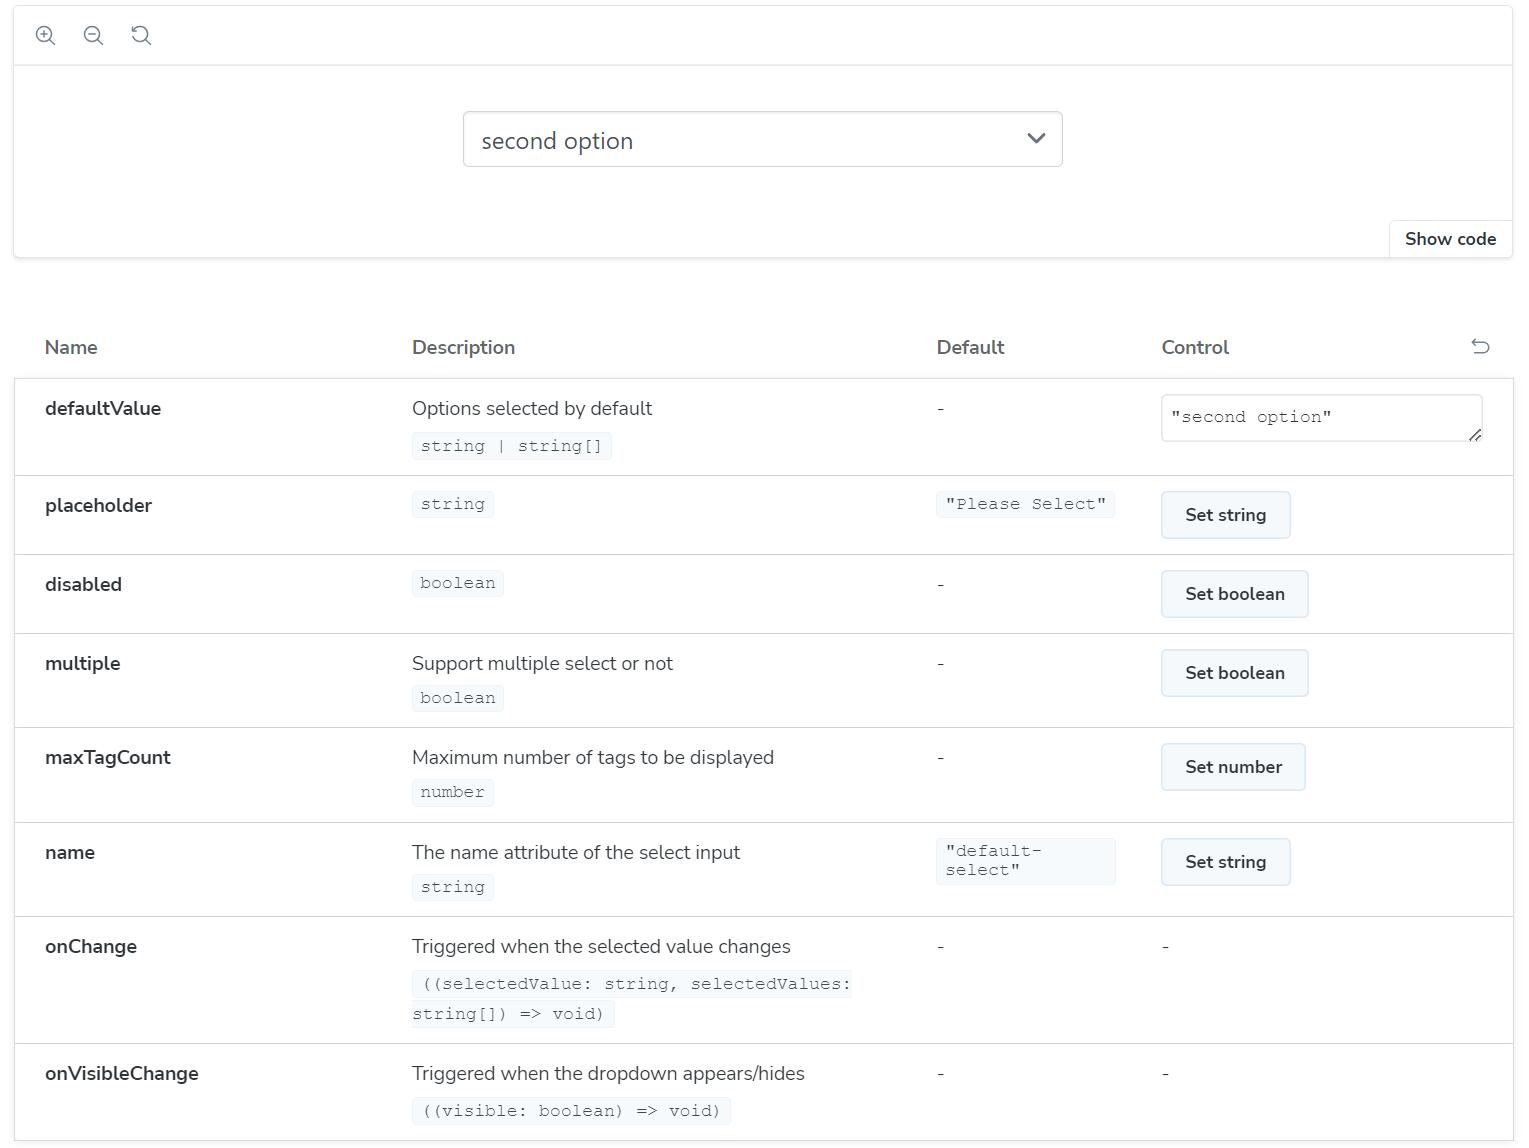
借助 Storybook + JSDoc 注释 + TypeScript 类型提示来实现组件库的自动文档生成,具体的安装及配置官方文档说的比较详细,这里只以 Select 组件为例,来介绍下 Storybook 的使用:
import type { Meta, StoryObj } from '@storybook/react'
import Select from '.'

const Option = Select.Option

const meta = {
  title: 'Select',
  component: Select,
  tags: ['autodocs'],
  decorators: [
    (Story) => (
      <div style={{ display: 'flex', justifyContent: 'center' }}>
        <div style={{ width: '400px' }}>
          <Story />
        </div>
      </div>
    ),
  ],
} satisfies Meta<typeof Select>

export default meta
type Story = StoryObj<typeof meta>

export const BasicSelect: Story = {
  args: {
    defaultValue: 'second option',
  },
  render: (args) => (
    <Select {...args}>
      <Option value="first option" />
      <Option value="second option" />
      <Option value="third option" disabled />
      <Option value="fourth option" />
    </Select>
  ),
}
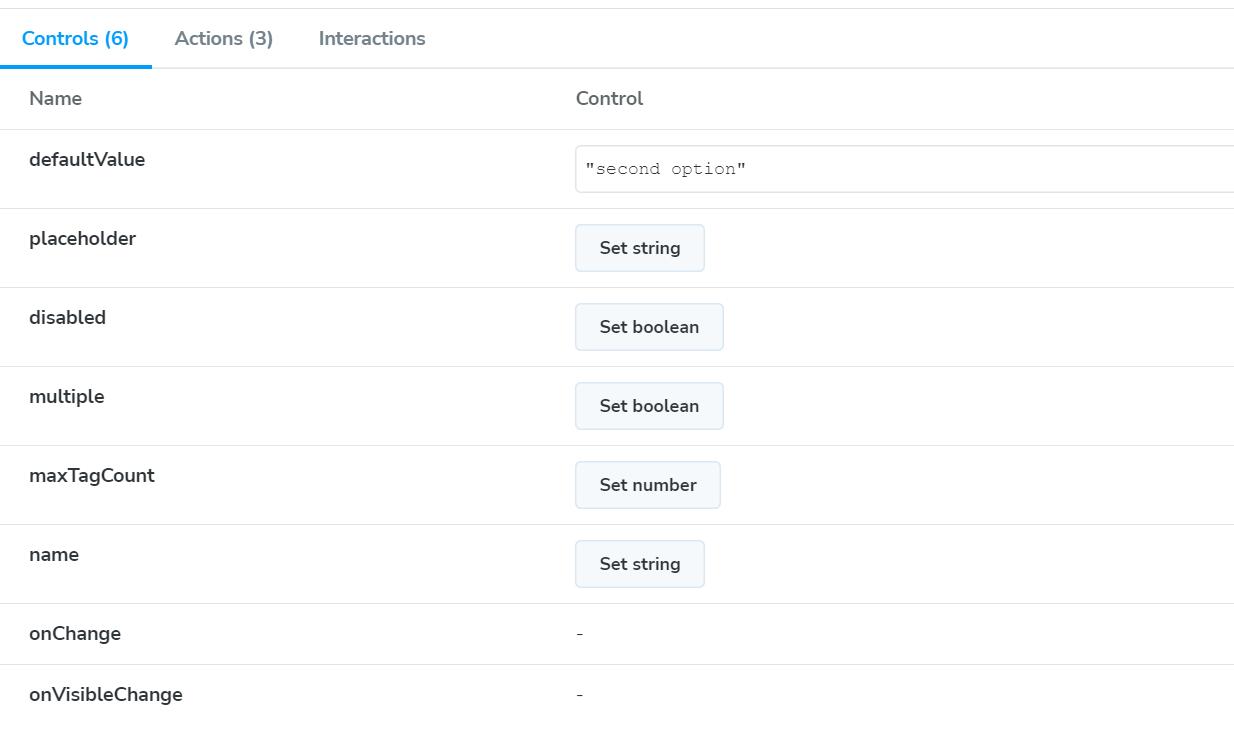
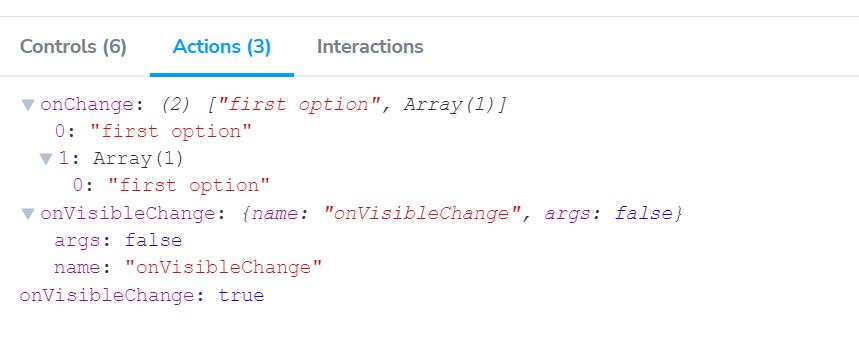
以上代码会生成一个基础 Select 框的交互式文档,文档首页会展示组件属性相关的描述、类型、默认值等,Controls 面板支持用户交互式更改组件属性,Actions 面板会记录用户交互所触发的组件事件。
六、npm 打包发布及文档网站 CI/CD
首先对依赖项进行精简,将只在开发环境下需要的依赖库移动到 devDependencies 中,减少安装我们 npm 包时所连带的依赖库:
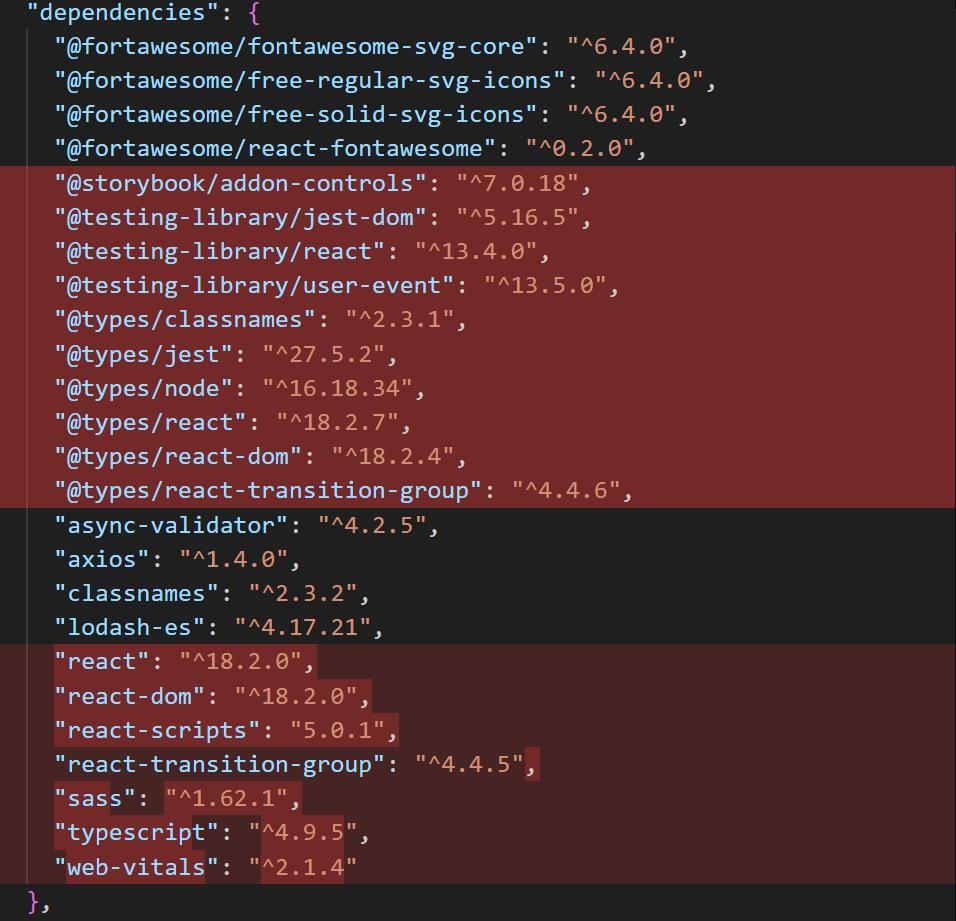
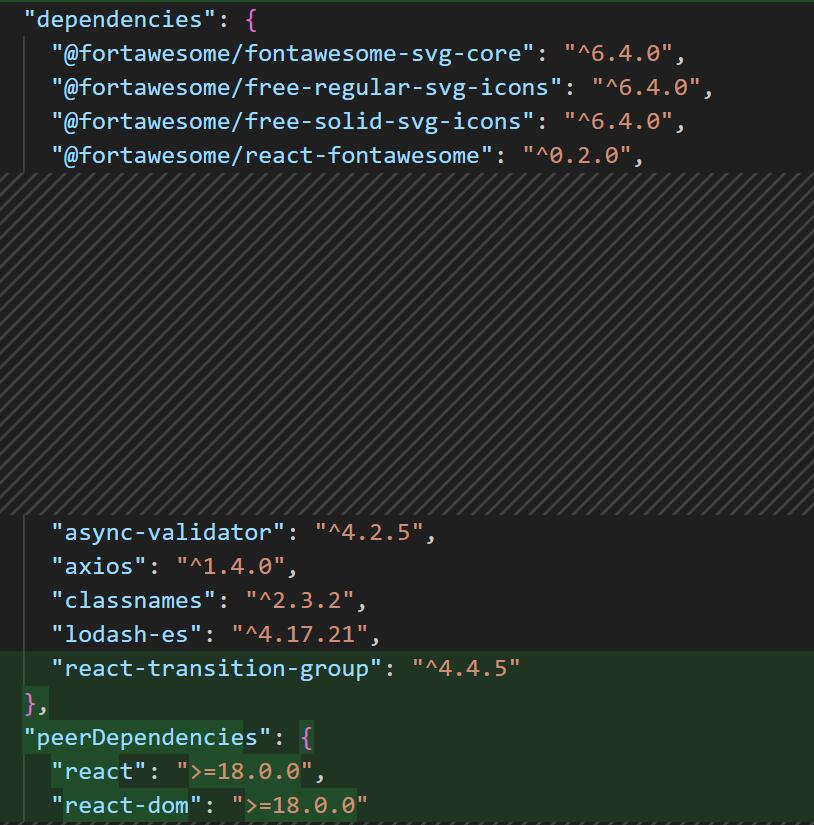
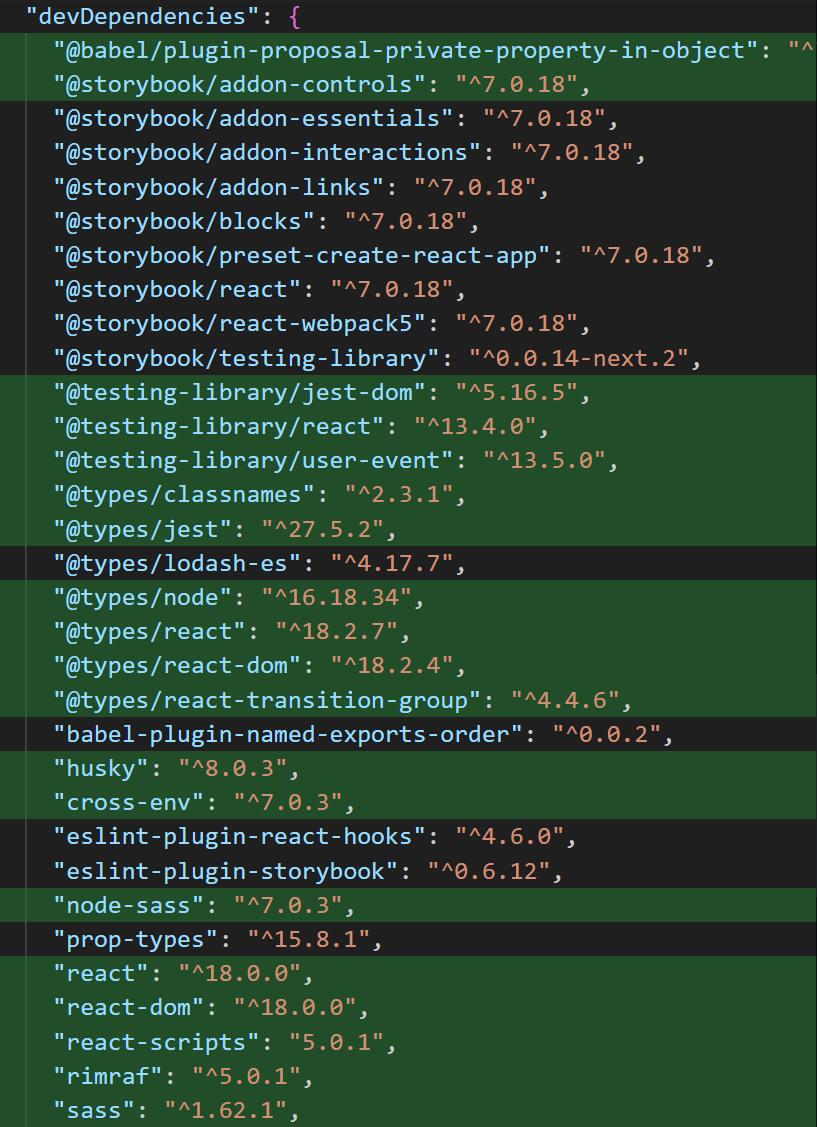
然后设置构建选项,其中,样式文件的编译使用 node-sass,TypeScript 的构建时编译选项设置如下:
// tsconfig.build.json
{
  "compilerOptions": {
    "outDir": "dist",
    "module": "esnext",
    "target": "es5",
    "declaration": true,
    "jsx": "react",
    "moduleResolution": "node",
    "allowSyntheticDefaultImports": true
  },
  "include": [
    "src"
  ],
  "exclude": [
    "src/**/*.test.tsx",
    "src/**/*.stories.tsx",
  ]
}
npm 包相关信息配置:
  // package.json
  "name": "russell-react-ui",
  "version": "0.1.2",
  "private": false,
  "description": "A Toy React Components Library Built by TypeScript and Sass",
  "author": "Russellwzr",
  "license": "MIT",
  "keywords": [
    "Component",
    "UI",
    "React"
  ],
  "homepage": "https://github.com/Russellwzr/russell-react-ui",
  "repository": {
    "type": "git",
    "url": "https://github.com/Russellwzr/russell-react-ui"
  },
  "files": [
    "dist"
  ],
  "main": "dist/index.js",
  "module": "dist/index.js",
  "types": "dist/index.d.ts",
与发布相关的脚本设置如下,然后登录 npm 账号,直接运行 npm publish 即可。
  // package.json
  "scripts": {
    "clean": "rimraf ./dist",
    "lint": "eslint --ext js,ts,tsx src",
    "build": "npm run clean && npm run build-ts && npm run build-css",
    "test:nowatch": "cross-env CI=true react-scripts test",
    "build-ts": "tsc -p tsconfig.build.json",
    "build-css": "node-sass ./src/styles/index.scss ./dist/index.css",
    "prepublishOnly": "npm run lint && npm run test:nowatch && npm run build",
  },
最后使用 Github Pages 部署文档网站,借助 Github Actions 实现 CI/CD,相关工作流的配置如下:
name: Build and Deploy Storybook Docs
on:
  push:
    branches:
      - main
jobs:
  build-and-deploy:
    runs-on: ubuntu-latest
    steps:
      - name: Checkout 🛎️
        uses: actions/checkout@v2

      - name: Install and Build 🔧
        run: |
          npm install
          npm run build-storybook

      - name: Deploy 🚀
        uses: JamesIves/github-pages-deploy-action@releases/v3
        with:
          ACCESS_TOKEN: ${{ secrets.RUSSELL_REACT_UI }}
          BRANCH: gh-pages
          FOLDER: storybook-static
其中,secrets.RUSSELL_REACT_UI �在 Repository secrets 中设置,从 Developer Settings/Personal access tokens 中生成,最后再设置下对应仓库的 workflow 权限即可。